December 21, 2013

Hello...

Well, that was a longer break than was intended, I haven't blogged since July.  I will be back in the new year with lots of new things and finally get those PDF patterns I've been working on published.  In the meantime, there have been big goings on in this household, one of which is the portrait my husband has been working on, which has been finally unveiled at the National Portrait Gallery this week.  We have had to keep this news quiet for sooooo long, it's nice to see it on the wall.  You may (or may not!) recognise who it is of...


Merry Christmas!

July 26, 2013

End of term,

I always find myself conflicted at this time of year when it comes to the phenomena of gifts for teachers.  Gone are the days when an apple would suffice, and while I am very grateful for the work teachers do educating our offspring, the part I prefer to avoid is the competitive gift giving that can go on.

My son has arrived on the last day of term with a perfectly respectable bunch of flowers only to see another child walking in with what looked like the whole of the Chelsea Flower Show.  I don't always make gifts but this year I did, which were small and discreet.

After deciding to stick with Owls, I took the pattern I had been using for brooches and reduced it further and made 3 of these... 


They came out quite well and I took the opportunity to time how long they took to make (roughly 1hour for each, that was 3 done in a morning, so 6 a day maybe, thinking in Etsy terms here).  I can see the beginnings of a production line forming!

July 10, 2013

Issue 4,

I am aware I've slipped on the blogging front lately, by way of a reprieve, check out the cover of Issue 4 of Homemade with Love!


It's out in the shops from July 12th, and available online here.

June 4, 2013

have you heard the news?

It's been busy lately, to a point where I almost forgot about my own blog!  In a nutshell, I am the new Web Editor for a UK published sewing magazine called 'Homemade with Love'.  I'm excited by the role for a number of reasons,


A lot has been happening over the last few years within the area of craft and sewing magazines in this country after a bit of a drought.  When I first arrived on the design scene, it was (oh, how I dislike admitting to this date), 1994!  I had finished my degree in 1992 and spent a bit of time plugging the gaps in my knowledge and experience by attending a computing course.  By 1994, I had an interview for a design job with Coats Crafts UK, so wanted to do a bit of research to prepare, and I bought this...


 'Inspirations' magazine, circa February 1994. 

Back then there weren't that many sewing mags around to choose from, but I do remember that Inspirations became a particular favorite of mine, due to a number of house moves and the growth of the internet since '94, this is the only issue I kept.  It even came with a cover kit, embroidered buttons.


The reason I kept hold of this one, is it featured an interview with a lady called Jacqueline Farrell.  A machine embroiderer who has since then written a few books and coincidentally worked in the Glasgow branch of Coats, the company I was just about to have an interview with, before they relocated to Darlington.


I cannot remember how I got hold of her number, but if memory serves, I actually rang Jacqueline and had a chat about the craft kit world and any tips she could offer to someone just starting out.  Coats were very impressed during my interview with the research I had done, and yes, I did get the job!


While I worked at Coats, the design studio regularly bought in sewing magazines, the internet was still very much in its infancy so any design ideas came from more traditional channels, the main two I remember being Crafts Beautiful and Marie Clare Idees.  Then, suddenly everything went very paper crafts orientated, and sewing projects in the crafts magazines were few and far between.  I'm very glad that sewing is once again hugely featured, with so many high quality publications available, including, of course, Homemade with Love.

And to prove how old my copy of Inspiration magazine is, look at the feature they did on the Spitting Image puppet making workshop!


May 23, 2013

Pin it Forward UK


My post today is all about Pinterest.  If you haven't already discovered Pinterest, why not?!!  Pinterest has been around since about 2010, and although it is accessible worldwide, the reason behind this push for the UK is there are some developments (new language and location settings) which will just make it more user friendly for the UK audience.  There are 300 bloggers taking part, and a big thank you to Antonia of Tidy Away Today for introducing my Pinterest post today.

Before Pinterest began, for a long while I had been after a kind of online pinboard for images.  I'd tried using Flick 'favorites', but that wasn't quite right, tried using Tumblr, but that wasn't quite right either.  I've always been in the habit of collecting images for inspiration.  When I worked as a designer for Coats Crafts UK, they had literally only just got the first computers in the design studio.  This was also before Google was created, so all our research was done the old fashioned way via magazines, books, wrapping papers, greetings cards etc.  I had folders full of ideas I collected and referred to constantly.  Pinterest was exactly what I had been looking for all these years.  And now, the first thing I do after taking the kids to school is check my Pinterest feed.

I have lots of boards, some I refer to daily, like style (so I at least look slightly human on the school run) and garden ideas (given we've been revamping our back garden at home).  But my all time favorite, is soft sculpture,


this one is my go-to place when I'm sewing, this is where all my favorite things live!

If you'd like to follow me, I am here, or if you're not already pinning, follow the registration link.

To continue on the Pin it Forward UK journey, please visit Rosie at DIYcouture who is showcasing this intriguing board 'we shall not cease from exploration', you can read up on the background behind this board here.

Happy Pinning!

May 15, 2013

tricks of the trade #2...

Following on from my previous post around this subject, this time I'm going to show you what I do with my ends of embroidery thread while I'm sewing a Softie. 

When I'm sewing, I often have a few different colours on the go, which rather then tying off, I'll thread through to the back in case I need that colour again.


But obviously, these thread are not going to be where I want them to be, when I come to use them again.  So how do I get from one place to another?  I simply use the needle to literally, snake the thread around the inside of the Softie.

Begin by waggling the thread to make the hole in the fabric slightly larger, then pull the thread hard in one direction to create a gap right next to it, feed the needle carefully though this same hole.  


Take the needle back out where you want it next to go, and gently pull on the thread.


Once the thread is pulled through completely the hole kind of magically disappears, it has now moved to the new position ready to continue the applique or repeat this process to move it further.


A simple process, but this is something I get asked a lot, so I hope that explains how I go about it when I'm sewing.

Something else I must mention is, hop on over to Cut Out & Keep which is a FAB resource for project tutorials, I am a Crafty Superstar this week, yay!  There is an interview and a project a day too.

May 7, 2013

from Pinterest to the garden...

I am taking part in a scheme called 'Pin-it-Forward' later this month to celebrate the official UK launch of Pinterest, (yes, I know here in the UK we can already use Pinterest, all will be explained in my official post on the 23rd), and as I was deciding which of my boards I was going to post about, realised I have over 1,600 images pinned.  It would be an interesting exercise to see how many of those images I actually refer to and made use of.

Only a few weeks ago, I came across this on Pinterest, someone I follow had pinned it so it featured in my feed, I followed the link to it's original source (which is where you can read up on how they were made), and decided to have a go myself.  


Mine are a bit smaller than the originals (although I love the idea of making a really big one with a wok!), I used enamel camping bowls at £1.50 each, red spray paint was £3.50, white enamel paint was £1.50 and the tree branches came from the garden.  I sprayed the bowls red (they were blue), and the kids did the white spots for me.
 
(the bunting and the bamboo wind chime both came from Ebay)

Al thinks they look a bit daft, but he's out voted as both me and the kids think they're rather cute!

May 5, 2013

Stitch Zakka,

I am in a new book which is coming out soon,


trying not to give too much away, the projects involve a bit of this,


and a little bit if that. 


The book is out in June.

May 2, 2013

tricks of the trade #1...

A while ago I made two short films which are uploaded to You Tube, one of those films, the free motion embroidery one has had over 160,000 views.  I keep meaning to make another, this time showing how I stuff a softie.  The reasoning for this is that I am quite brutal when it comes to getting that stuffing in, there's lots of banging and bashing it on a table top involved to shape it, and poking with a stick, which is what brings me to the point of this post, tricks of the trade #1...

STICKS

  I find that all artists and designers always have certain tools they love, and I do love my stuffer sticks.  Except this one is not really a stuffer stick, it's a chop stick!


Now, you can buy proper bona fide stuffer sticks,

 (my Harry Potter wand)

and I do have one, except mine wasn't bought, I pinched it. 

When I worked for Coats Crafts UK (I can tell this story now as I haven't worked there for a good few years now!), one thing that did bug me was their reluctance to try anything new.  Ideas would be put forward at the product development meetings only to be met with a negative reaction, that was until one of our competitors came out with something similar.  Imagine the scene : an idea that had been pitched for a while :  Rag Doll kits, 'Oh no, couldn't possibly do that, too complicated/expensive'.  That was until a company called the Little Experience came out with a range, then the reaction was 'We should be doing these, why aren't we doing these?'.  Err, well we could have been doing them if you'd listened to your design team!

The story rolls on, as happens in most in-house design studios, we then have to go and purchase one of the competitor products for manufacturing analysis.  Inside said kit, was exhibit A, the stuffer stick, which eventually fell into my bag and made it's way home.  While this particular stuffer stick is very nice, has been extremely useful over the years, and also doubles as a wand occasionally, I do tend to revert back to my trusty old chop stick (which was also 'acquired', this time from a chinese restaurant), and this is why...


Stuffer sticks are used to get the stuffing into all the little nooks and crannies of a softie.  I use the end to push small chunks of stuffing in one at a time.  The chop stick is thinner than the stuffer stick, but despite that, it seems to retain it's strength, which is good as even when I'm being really rough with it, it doesn't feel like it's going to break. 


I also find the little square end it has very useful.  Quite often when I'm stuffing softies, I'll get issues like the one above, a stubborn crease which will just not go.  The most effective way to rectify this, 


is to take a small piece of stuffing,


and gently push it into place, over the existing stuffing, to fill out the crease with the square end.  The chop stick works better for me in this instance, as the pointed end of the stuffer stick is too fine and pokes straight through the stuffing I'm trying to get in, and the flat end is too wide as it tends to move not only the extra stuffing, but also what is already inside, which is exactly what I don't want it to do having already spent time shaping it.

So, that's it, a post all about sticks!  Just to finish off, here's oops of the week...


I made two right ears, ...oops!

April 16, 2013

sewing bee...

Here in the UK, everyone in the crafting world is currently going Great British Sewing Bee crazy (for what it's worth, I am Team Lauren), although I suspect the rather easy on the eye Patrick Judge may have a little something to do with it's popularity!

Anyway, in celebration of all the sewing machines which will no doubt now be being purchased, here is my contribution to get people sewing.  In the Sewing Bee, they are making clothes.  In my humble opinion, sewing clothes can be quite complicated, so if you are new to the craft, here's a simple little project to try which encompasses a handful of techniques, a sewing bee softie...


You will need :

selection of fabric : black & yellow (I used fabrics with sewing related prints!)
selection of craft felt
toy stuffing
2 small buttons or beads
sewing thread
embroidery thread (I used Pearl Cotton 8)
paper, pencil & scissors
pins & a needle


Step 1 : First create 2 squares of fabric, (8x8cm) by patch-working together 3 strips for each. 


Step 2 :  Draft yourself a pattern for the Bees body by drawing an oval shape onto the paper that is roughly 6.5cm tall and 5cm across.  Cut out and pin the template to the first of the fabric squares and trim to size.  Repeat for the other piece.


Step 3 : Pin the 2 fabric ovals, right sides together, sew round the edge to join (either by hand using backstitch or on a sewing machine), leaving a small gap for turning it back right side round.


Step 4 : Through the gap, stuff the bee, tuck in the fabric edges and then stitch the gap closed.


Step 5 : Switch to the embroidery thread and add eyes by attaching 2 small circles of craft felt with a tiny button or bead in the center.


Step 6 : Make yourself another template, this time a wing shape (mine is kind of like a flower petal) and cut 2 from the craft felt.  Stitch into position with the embroidery thread.


Step 7 : To finish off, after the wings are attached, take the needle up through the middle of the bee and tie a loop in this thread so you can hang your bee up.

And that's it, all done.  A quick bit of sewing and you've practiced pattern drafting, patchwork, sewing, applique and embroidery!  You could make lots and create a mobile, and even nip over to Whip Up for the Ladybird project I posted there, both insects are about the same size so will work great as a pair.

April 11, 2013

dalmatian...


I don't know if it's my internet or blogger itself that is to blame, but it's just taken me over an hour to just load up this one image!  So, to play it safe for now, all I'm going to say is...

Dalmatian Softie (spelt it right first time for once!)  ...is on Etsy now.

March 30, 2013

Fabric & felt...


When I started designing patterns for the Countryside Softies book, there were decisions to be made regarding materials.  I tend to work mainly using a base of felted wool, and for a number of reasons chose to stick with this as it's easy to work with, very forgiving for those who are a bit nervous about their stitching, and also I do love the way it looks for the finished piece.

But, I was also aware that Softie design is already a fairly smallish market, and one which was reduced further by the use of felted wool.  I've had quite a few emails from crafters struggling to find wool clothing suitable to use.  My own stash has not been added to as often as I would like.  I will still be using felted wool for items I make myself, but it's what they call a 'no brainer' for any PDF patterns I release to use fabrics as their base.  Which means I'm now working on choosing which fabrics to use for which designs, which is actually amazingly hard, as from a business perspective, the fabrics can't overpower the design as the images of the finished pieces are what will potentially sell the patterns.  

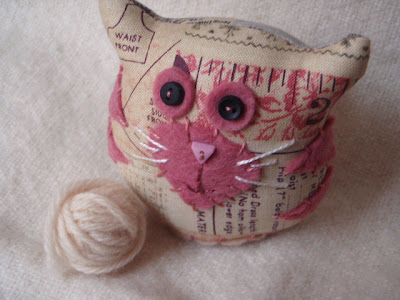
Also, as a way of giving my patterns a bit of kerb appeal, it's all about the added extras.  This is why I'm aiming for the patterns to include other bits and pieces, like the cat pattern will be a large cat design alongside the kitten, mouse and a miniature ball of wool.  I'm also waiting till I've got 3 patterns complete, as if I launch three instead of just one initially, again from a business perspective it gives more opportunities to run launch offers, 2 for 1 that kind of thing.  

As an aside, do you think there is a market for scrap bags of felted wools?  It's something I'm going to give a try, but one factor coming up against the idea is our UK postal system and the recent increased charges!  Not good for small businesses at all and it's leaving many to have to re-think their product range entirely, which is a real shame.
March 7, 2013

Etsy update,

I've added a few new items to the Etsy shop, they are...

SOLD

Fantastic Mr Fox, using that lovely Marvel comic print I talked about last time,


some cotton reel pincushions, using the same fabric,


and three more pincushions using a sewing pattern print as I'm always getting a steady trickle of emails enquiring about these so thought it would be a good idea to sew a little batch.

All are on Etsy now


February 20, 2013

Super,

It must be noticeable to blog readers that I haven't been blogging with any regularity of late.  I think it's something most bloggers in any subject hit at sometime or another, a bit of writers block along with a dose of self doubt, why do I blog and do I want to continue?  I do want to carry on, I know that much at least.  Baby steps, baby steps...

First place to start is a run down of what's been going on here...

An online friend featured some Marvel comic fabric in a project she made on Facebook, which caught my eye.  I got some from Ebay (UK link) and have tracked it's origins as being from Camelot Fabrics who seem to have the license for Marvel.  Have to admit though, the comic book cover fabric (USA link) is definitely my favorite.  

  
Of course, as soon as it arrived, my son's eye's flashed wider with a 'ooooh, is that for me?' expression.  I'm sure some will make it's way into his room eventually (and join the scraps he is currently squirreling away in his bed/nest), but for now, it is intended for a few Superhero type Softies.

Fantastic Mr Fox/Dame Edna

Apologies for the out of focus image, it's from Instagram, but how do you make Superhero eye masks, look like eye masks and not glasses??  It's a real problem.  And Luke tells me Mr Fox needs a cape as all Superheros should have a cape.  I am drawing a line at red underpants though!

February 4, 2013

Love Quilting & Patchwork...


There is a new magazine on the way this Spring, from the publisher behind Mollie Makes, called 'Love Quilting & Patchwork'

It even comes with a free quilting book.

But, most exciting of all, there's a patchwork Owl pattern (see, there on the front cover) in there designed by little old me!

So, if you fancy bagging yourself a copy, hop on over here, it's on sale from the 14th February.


January 25, 2013

FORMula...

Introducing 'FORMula'...

 (this will be the back page)

My upcoming range of PDF sewing patterns!

I've finally done it, learned to use Adobe Illustrator, which didn't come easily I have to admit, and am almost ready to upload the first pattern.  They will be on sale initially via both Etsy and Craftsy.

Layout is all pretty much sorted and the instructions are all typed up.  I just need to scan in the pattern templates, some decent light for photography, then to test out the document by emailing it to a few friends and family as a dummy run and we're good to go!